Your Spring Roof Checklist: Spotting Post-Winter Damage Before It Becomes a Problem in the Niagara Region

Photo by Photo by Ken Whytock on Unsplash on Unsplash
Spring in St. Catharines carries a welcome sense of renewal—warmer temperatures, longer days, and the gradual retreat of snow from rooftops and lawns. But while the season invites optimism, it also reveals what winter has left behind. For homeowners across the Niagara region, spring is the single most important time of year to take stock of their roof's condition.
The combination of lake-effect snow, sustained freezing temperatures, and the relentless freeze-thaw cycling that characterises late winter in this part of Ontario is among the most punishing weather patterns a residential roof can endure. By the time April arrives, your roofing system has been through months of thermal stress, moisture exposure, and physical loading. The damage may not be dramatic, but it is often present—and if left unaddressed through another warm season, it will almost certainly worsen.
The following checklist is designed to help St. Catharines homeowners conduct a structured post-winter assessment. Some items can be evaluated safely from the ground or through the attic; others warrant a professional inspection for a complete picture. Either way, knowing what to look for is the essential first step.
1. Shingle Condition: Look for These Warning Signs
Shingles are your roof's first line of defence, and they bear the brunt of winter's punishment. Begin your inspection by scanning each visible roof plane carefully, either from the ground with binoculars or from a safe vantage point such as an upper-floor window.
Curling or cupping: Shingle edges that have begun to lift upward (cupping) or curl back from the centre (clawing) indicate moisture damage or age-related deterioration. These shingles are no longer lying flat against the roof deck and are vulnerable to wind uplift.
Missing shingles: Winter storms, particularly those with sustained gusts, can dislodge shingles that were already weakened. Even a single missing shingle creates an exposed section of underlayment that will not hold up through the spring rain season.
Granule loss: Look for bare or discoloured patches on the shingle surface, or check your gutters and downspout discharge areas for accumulations of grey or black granules. Significant granule loss accelerates UV degradation and reduces the shingle's waterproofing effectiveness.
Cracking or splitting: Temperature cycling can cause shingles to crack along their surface or split at the tabs. These fractures may be subtle from a distance but allow moisture to penetrate to the underlayment beneath.
2. Flashing Integrity: A Common Source of Leaks
Flashing—the metal strips that seal transitions and penetrations in your roof—is among the most failure-prone components after a Niagara winter. Thermal expansion and contraction across the freeze-thaw season gradually works flashings loose from their sealed positions.
Chimney flashing: Inspect the metal at the base of your chimney where it meets the roof surface. Look for gaps, lifted edges, or visible rust. Failed chimney flashing is one of the most common sources of interior water damage we encounter at St. Catharines Roofing Pros.
Pipe and vent stack boots: The rubber or metal collars around plumbing stacks and exhaust vents crack and harden with age and cold. Check for splits in the rubber collar or gaps where the boot meets the pipe.
Skylight perimeter flashing: If your home has skylights, examine the metal trim and sealant at all four edges. Pooling from ice dams is particularly hard on skylight flashings, and spring is when resulting leaks often first appear.
Wall step flashing: Where a roof plane meets a vertical wall—such as at a dormer or an addition—step flashing can be pulled away by ice movement. Look for gaps or lifted metal along these transitions.
3. Ice Dam Aftermath: Damage That Lingers After the Ice Is Gone
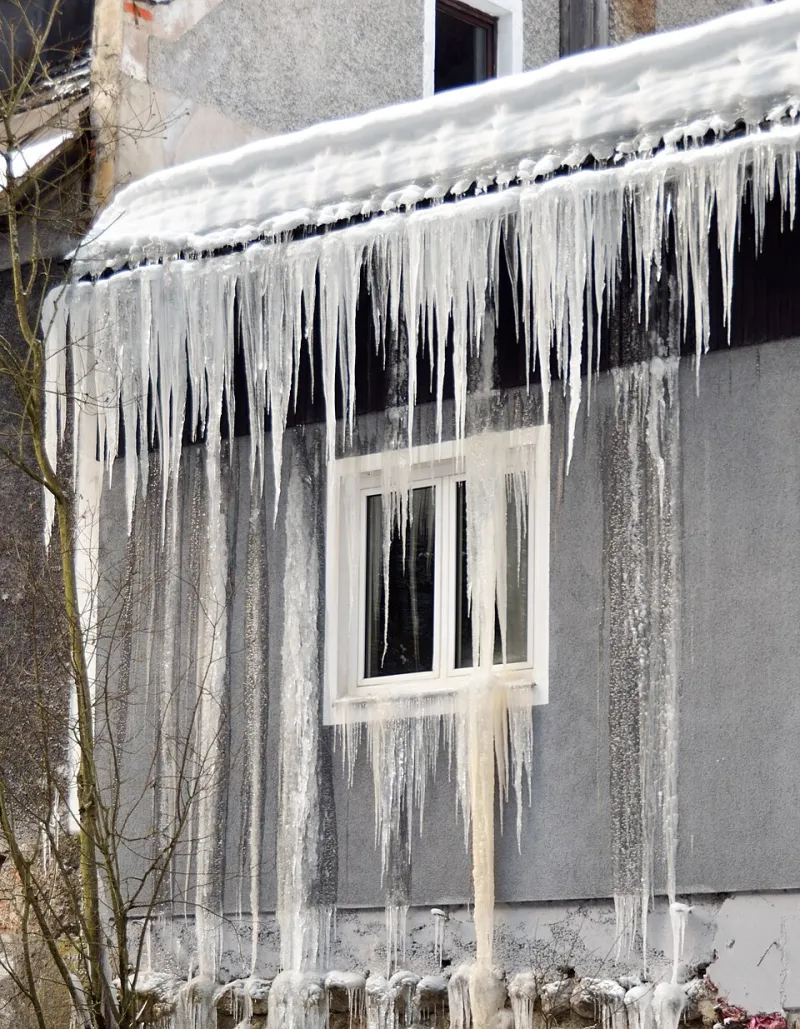
Ice dams form when heat loss from the attic warms the roof deck, melting snow that then refreezes at the cold eaves. Even if you did not notice ice dams forming this past winter, their effects may still be present.
Lifted or missing eave shingles: The weight and expansion of ice along the eaves can physically displace shingles or tear them away. Inspect the lowest course of shingles on each roof plane carefully.
Damaged soffit and fascia: Ice dam meltwater that backs up under the shingles often finds its way into the soffit and fascia. Look for paint peeling, wood discolouration, or soft spots along the eave line.
Interior water stains: Check the ceilings in rooms directly below the eaves—bedrooms, upper hallways, and closets are common locations. A faint watermark or slight discolouration in the paint or drywall is an early indicator of ice dam infiltration that has not yet become an active leak.
Attic frost or staining: While you are in the attic, look for frost accumulation on the underside of the roof deck, dark staining on the sheathing, or damp insulation near the eaves. These are reliable indicators of moisture infiltration during the cold season.
4. Gutter and Drainage System: Clear the Way for Spring Rain
Gutters that functioned as ice channels all winter are rarely in perfect condition by spring. A blocked or damaged gutter system redirects water toward your foundation and fascia rather than away from your home.
Clear debris accumulation: Leaves, seed pods, and shingle granules that accumulated before freeze-up are still present under any remaining ice. Clear gutters thoroughly and flush downspouts with a garden hose to confirm unobstructed flow.
Check for sagging or separation: Ice loading is heavy, and gutters that were not properly fastened or that were already aged may have pulled away from the fascia or begun to sag between brackets. Sagging gutters pool water rather than channelling it.
Inspect downspout extensions: Confirm that downspout extensions are directing water at least 1.5 to 2 metres away from the foundation. Extensions can be displaced during snow removal or freeze-thaw heaving of the ground.
Look for rust or cracks: Older metal gutters may show rust spots or hairline cracks that were masked through the winter and will become active leaks under spring rainfall.
5. Attic Ventilation and Insulation: The Interior View
A spring roof inspection is not complete without a look inside the attic. Adequate ventilation and intact insulation are critical to preventing the moisture problems that compound over time.
Check for adequate airflow: Confirm that soffit vents are not blocked by insulation and that ridge vents or roof vents appear unobstructed. Poor attic ventilation contributes to both ice dam formation in winter and premature shingle degradation in summer.
Assess insulation condition: Compressed, matted, or discoloured insulation near the eaves may indicate that moisture infiltration has occurred. Wet insulation loses its thermal value and can promote mould growth if not addressed.
Look for daylight: In a darkened attic, any visible daylight coming through the roof deck or around penetrations indicates a gap that requires immediate attention.
When to Call a Professional
This checklist is a valuable starting point, but it is not a substitute for a professional assessment. If you identify any of the issues above—or if you simply want the confidence that comes from a thorough, documented evaluation—the experienced team at St. Catharines Roofing Pros is available for comprehensive spring inspections throughout the Niagara region.
Addressing post-winter damage promptly, before the spring rain season is fully underway, is the most cost-effective approach available to homeowners. Small repairs completed in April or May are consistently less expensive than the remediation work that follows a summer of unaddressed moisture intrusion. Make this spring the season you get ahead of your roof maintenance—your home, and your budget, will be better for it.